Welcome To Myanmar IT Sky

Go to Blogger edit html and find these sentences.Now replace these sentences with your own descriptions.This theme is Bloggerized by Lasantha Bandara - Premiumbloggertemplates.com.

Title(2)

Myanmar IT Sky ကိုၾကြေရာက္လာၾကတဲ့မိတ္ေဆြမ်ားအားလံုး ရႊင္လန္းခ်မ္းေျမ့ၾကပါေစခင္ဗ်ာ.......

Title(3)

Computer Software / Game ႏွင့္ Mobile App / Game မ်ားကို မိမိစိတ္ၾကိဳက္ ေဒါင္းယူပီး သံုးဆြဲႏိုင္ပါတယ္ခင္ဗ်ာ. ေက်းဇူးျပဳပီး Facebook Like လုပ္ေပး ဖို႕ေတာ့ေတာင္းဆိုပါတယ္ခင္ဗ်ာ. ေက်းဇူးတင္ပါတယ္....

Title(4)

Computer Software / Game ႏွင့္ Mobile App / Game မ်ားကို မိမိစိတ္ၾကိဳက္ ေဒါင္းယူပီး သံုးဆြဲႏိုင္ပါတယ္ခင္ဗ်ာ. ေက်းဇူးျပဳပီး Facebook Like လုပ္ေပး ဖို႕ေတာ့ေတာင္းဆိုပါတယ္ခင္ဗ်ာ. ေက်းဇူးတင္ပါတယ္....

Title(5)

Computer Software / Game ႏွင့္ Mobile App / Game မ်ားကို မိမိစိတ္ၾကိဳက္ ေဒါင္းယူပီး သံုးဆြဲႏိုင္ပါတယ္ခင္ဗ်ာ. ေက်းဇူးျပဳပီး Facebook Like လုပ္ေပး ဖို႕ေတာ့ေတာင္းဆိုပါတယ္ခင္ဗ်ာ. ေက်းဇူးတင္ပါတယ္....

Title(6)

Computer Software / Game ႏွင့္ Mobile App / Game မ်ားကို မိမိစိတ္ၾကိဳက္ ေဒါင္းယူပီး သံုးဆြဲႏိုင္ပါတယ္ခင္ဗ်ာ. ေက်းဇူးျပဳပီး Facebook Like လုပ္ေပး ဖို႕ေတာ့ေတာင္းဆိုပါတယ္ခင္ဗ်ာ. ေက်းဇူးတင္ပါတယ္....

Title(7)

Computer Software / Game ႏွင့္ Mobile App / Game မ်ားကို မိမိစိတ္ၾကိဳက္ ေဒါင္းယူပီး သံုးဆြဲႏိုင္ပါတယ္ခင္ဗ်ာ. ေက်းဇူးျပဳပီး Facebook Like လုပ္ေပး ဖို႕ေတာ့ေတာင္းဆိုပါတယ္ခင္ဗ်ာ. ေက်းဇူးတင္ပါတယ္....

Title(8)

Computer Software / Game ႏွင့္ Mobile App / Game မ်ားကို မိမိစိတ္ၾကိဳက္ ေဒါင္းယူပီး သံုးဆြဲႏိုင္ပါတယ္ခင္ဗ်ာ. ေက်းဇူးျပဳပီး Facebook Like လုပ္ေပး ဖို႕ေတာ့ေတာင္းဆိုပါတယ္ခင္ဗ်ာ. ေက်းဇူးတင္ပါတယ္....

Title(9)

Computer Software / Game ႏွင့္ Mobile App / Game မ်ားကို မိမိစိတ္ၾကိဳက္ ေဒါင္းယူပီး သံုးဆြဲႏိုင္ပါတယ္ခင္ဗ်ာ. ေက်းဇူးျပဳပီး Facebook Like လုပ္ေပး ဖို႕ေတာ့ေတာင္းဆိုပါတယ္ခင္ဗ်ာ. ေက်းဇူးတင္ပါတယ္....

Title(10)

Computer Software / Game ႏွင့္ Mobile App / Game မ်ားကို မိမိစိတ္ၾကိဳက္ ေဒါင္းယူပီး သံုးဆြဲႏိုင္ပါတယ္ခင္ဗ်ာ. ေက်းဇူးျပဳပီး Facebook Like လုပ္ေပး ဖို႕ေတာ့ေတာင္းဆိုပါတယ္ခင္ဗ်ာ. ေက်းဇူးတင္ပါတယ္....

Yx

Yx

Yx

Yx

Yx

A-ads

A-ads

A-ads

Yllix

Showing posts with label Window ႏွင့္ဆိုင္ေသာ. Show all posts

Monday, March 3, 2014

Window 8 Fonts Changer ( for PC )


Window 8 Fonts ၿပသနာမ်ားကို ကလစ္တစ္ခ်က္ႏွိပ္ယံုနဲ႕ ျမန္မာစာအဆင္ေျပမဲ့ ေဆာ့ဖ္၀ဲေလး ကို  တင္ေပးလိုက္ပါတယ္ခင္ဗ်ာ. ေအာက္က ေဖာ္ျပထားတဲ့ နည္းေလးအတုိင္း သာလုပ္ၾကည့္ပါ.. ေဒါင္း
လို႕ရထားတဲ့ Rar ဖိုင္ထဲမွာလဲ ပံုေလးထည့္ေပး ထားပါတယ္. ေအာက္မွာေဒါင္း ယူႏုိင္ပါပီဗ်ာ.

Item မွာ iConFont ေရြး >>> Font မွာ Zawgyi-One ေရြး >>> Apply ႏွိပ္ >>> Log Off ႏွိပ္လိုက္ပါ ။

စက္ပိတ္ၿပီး ၿပန္ပြင့္လာတဲ့အခါ Desktop မွာ ၿမန္မာေဖာင့္ေပၚလာတာကို ၿမင္ေတြ႕ရပါမယ္ :)


DOWNLOAD


Credit >> DjjoeMan(MMF)

အဆင္ေျပပါေစခင္ဗ်ာ........
Myanmar IT Sky

Download အဆင္မေျပရင္ ေက်းဇူးျပဳၿပီးစာေလးေရးၿပီးေျပာခဲ့ပါဗ်ာ.. မိတ္ေတြမ်ားအားလံုး အတြက္ အဆင္ေျပေအာင္အတတ္ႏိုင္ဆံုးၾကိဳးစားေပးပါမယ္ခင္ဗ်ာ။

Monday, February 10, 2014

Yamicsoft Windows 8 Manager ( for PC )

Yamicsoft-Windows-8-Manager-2_web.jpg
Add caption
Yamicsoft-Windows-8-Manager-1_web.jpg


Window 8 Manager ေလးပါ.. ဒါဆိုအားလံုး
သိပီးသားျဖစ္မွာပါေနာ္.. ေအာက္မွာေဒါင္း
ယူႏိုင္ပါတယ္ခင္ဗ်ာ..


Windows 8 Manager is a system utility that
 helps you optimize, tweak, repair and clean up
Windows 8. It will increase your system speed,
eliminate system fault, improve system security,
and meet all of your expectations.

Features and Benefits of Windows 8 Manager

Information:
Get detailed system and all hardware information on your system; help you find out the installation key of Windows, Office products; show all detailed information of running processes and threads on your machine; Windows 8 Manager offers 1-clicking Cleaner cleans your system automatically; Repair Center helps you to fix various system problems.

Optimizer:
Tweak your system to improve windows startup and shutdown speed, tweak your hardware to increase system speed and performance; Control what is started on Windows startup, check and repair the advanced starup items to restore the malicious change by viruses; Tune up and optimize system services and Task Schedule, turn off smartly some unnecessary system services and tasks to improve system performance.

Cleaner:
Find out which files or folders engross your disk space and shown with chart; Smart Uninstaller can fully delete programs from your system without residual files and Registry entries; Find and clean junk files to increase Hard Disk space; Duplicate Files Finder can scan your computer for files with the same size, name and modification time; Registry Cleaner checks and repair incorrectly linked Registry entries; Registry Defrag rebuilds and re-indexes your Registry to reduce registry access time and therefore improve application responsiveness; Desktop Cleaner can clean useless icons and files on Desktop easily.

Customization:
Customize the look of your system by tweaking system Explorer, Desktop, Start Menu, Taskbar and notification area; Create the quick startup items on Taskbar with the Jump List launcher; Tune up Windows 7 boot menu; Edit context menus of mouse Right-Clicking; Edit easily the Win + X menu that shown when right-click on Desktop bottom-left corner or Win + X keyboard shortcut ; Create the shortcut that executed quick on run dialog box. Visual Customizer can change system and file type icons, custom the logon background.

Security:
Improve system security by tweaking system components, UAC and login settings; Tune up System Restore options; Hide and restrict to access drives and programs; Encrypt/decrypt files, move system folders to safe locations; Undelete the files that accidentally deleted or formatted on disk; Privacy Protector can maintain your personal privacy by eliminating the tracks that you leave behind; Hide, add or delete the Control Panel entries.

Network:
Optimize your Internet connection speed, manage all shares items; Tweak your Internet Explorer easily; IP Switcher can switch your IP address easily on different networks; Edits the Hosts file to speed up surfing internet and permit only to access the specified Hosts.

Misc. Utilities:
Show the collection of Windows utilities; split and merge any files; Automatically back up files regularly using Super Copy. Registry Tools help you to operate Registry easily.


DOWNLOAD


အဆင္ေျပပါေစခင္ဗ်ာ........
Myanmar IT Sky

Download အဆင္မေျပရင္ ေက်းဇူးျပဳၿပီးစာေလးေရးၿပီးေျပာခဲ့ပါဗ်ာ.. မိတ္ေတြမ်ားအားလံုး အတြက္ အဆင္ေျပေအာင္အတတ္ႏိုင္ဆံုးၾကိဳးစားေပးပါမယ္ခင္ဗ်ာ။

Thursday, January 30, 2014

Windows 7 Manager 4.3.8 Full + Keygen ( for PC )


Window 7 Manager ဆိုရင္မိတ္ေဆြမ်ားအားလံုးသိပီးျဖစ္မွာပါ.
Window 7 ကိုအသံုးျပဳတဲ့မိတ္ေဆြမ်ားအတြက္အသံုး၀င္မွာပါ.
အသစ္ေလးထြက္လာလို႕တင္ေပးလိုက္ပါတယ္ခင္ဗ်ာ. 
ေအာက္မွာေဒါင္းယူႏိုင္ပါတယ္ခင္ဗ်ာ.
Windows 7 Manager 4.3.8 Full + Keygen is a system utility that helps you optimize, tweak, and clean up Windows 7. It will increase your system speed, improve system security, and meet all of your expectations. Why Should I use Windows 7 Manager? Windows 7 is the newest Operating System for home users and professionals alike. Windows 7 brings clarity to your world, so you can more safely and easily accomplish everyday tasks and instantly find what you want on your PC.

Windows 7 Manager 4.3.8 Full + Keygen is the powerful software tool to tweak and optimize your Windows 7, it bundles more than 30 different utilities in one and help your system faster and more stable, secure and personal.

Features and Benefits of Windows 7 Manager 4.3.8 Full + Keygen:

    Information - Get detailed system and all hardware information on your system; help you find out the installation key of Windows, Office products; show all detailed information of running processes and threads on your machine; Windows 7 Manager offers 1-clicking cleans your system automatically.
    Optimizer - Tweak your system to improve windows startup and shutdown speed; tweak your hardware to increase system speed and performance; Optimize Task Schedule to turn off unnecessary system tasks.
    Cleaner - Find out which files or folders engross your disk space and shown with chart; Find and clean junk files to increase Hard Disk space; Duplicate Files Finder can scan your computer for files with the same size, name and modification time; Registry Cleaner can easily checks your registry and repair incorrectly linked registry entries, automatically remove invalid entries; Registry Defrag rebuilds and re-indexs your registry to reduce application response time and registry access time.
    Customization - Control what is started on Windows startup; tune up Windows 7 boot menu; edit context menus of mouse Right-Clicking; customize system desktop, menus, toolbar and notifications settings; automatically change your desktop wallpaper on background.
    Security - You can improve desktop, menus, Windows logon securities, and enable numerous hidden performance options of system, disable system updates and error reports; hide and restrict to access drives, specify which applications are not allowed to be executed on your computer; encrypt/decrypt and shred files, change the location of system folders; Privacy Protector can maintain your personal privacy by eliminating the tracks that you leave behind; create lots of randomization password once.
    Network - Optimize your Internet connection speed, manage all shares items; tweak your Internet Explorer easily.
    Misc. Utilities - Show the collection of Windows utilities; split and merge any file.

DOWNLOAD


အဆင္ေျပပါေစခင္ဗ်ာ........
Myanmar IT Sky

Download အဆင္မေျပရင္ ေက်းဇူးျပဳၿပီးစာေလးေရးၿပီးေျပာခဲ့ပါဗ်ာ.. မိတ္ေတြမ်ားအားလံုး အတြက္ အဆင္ေျပေအာင္အတတ္ႏိုင္ဆံုးၾကိဳးစားေပးပါမယ္ခင္ဗ်ာ။

Saturday, December 14, 2013

StartIsBack Plus 1.0.5 ( for PC )


မိမိ PC က Start bar ကို window 8 ဒီဇိုင္းအလန္းေလး
နဲ႕သံုးၾကည့္ျခင္တဲ့မိတ္ေဆြမ်ားအတြက္စမ္းသံုးၾကည့္လုိက္
ပါဗ်ာ. ေအာက္မွာအေသးစိတ္ဖတ္ၾကည့္ပီးေဒါင္းယူႏိုင္ပါတယ္ေနာ္.

The missing Windows 8 start menu is back. Get the most useful and authentic start menu for Windows 8 and Windows 8.1. StartIsBack is a tiny application that gives you the possibility of assigning the classical Start button and Start menu to Windows 8. It packs a few configuration settings that can be handled by users of any level of experience.

Unlike other similar apps which return the old Start menu and button, the side menu of StartIsBack is transparent and highlights every new program in the list.

When it comes to functionality, StartIsBack integrates some useful features. For example, if you search the computer for a new item, this is instantly shown in the results area (if it was previously indexed by Windows).

As we have mentioned before, StartIsBack comes with a multitude of configuration settings; these concern the Start menu items and behavior (e.g. display My Computer as a link, hide Default Programs and Device and Printers), appearance (e.g. disable taskbar translucency, hide the Start button) and switching rules (e.g. show the desktop when logging onto the PC, switch to the last used application when clicking the Start screen).

Other options refer to uncluttering items in the Start screen (by renaming the Start screen to "Apps" and by keeping only the modern apps in that location), the advanced system commands menu (combine the Start button context menu with the one of the Start screen) and Windows tweaks (e.g. store and display recently opened programs). Furthermore, you can disable StartIsBack for the current user.

StartIsBack does not put a strain on the computer's overall performance, as it uses a pretty low amount of CPU and system memory. It is pretty responsive to key strokes and mouse commands. We have not encountered any issues throughout our testing; StartIsBack did not hang, crash or display error dialogs. Thanks to its intuitive yet rich features, the application should please users of all skill levels.

DOWNLOAD


အဆင္ေျပပါေစခင္ဗ်ာ........
Myanmar IT Sky

Download အဆင္မေျပရင္ ေက်းဇူးျပဳၿပီးစာေလးေရးၿပီးေျပာခဲ့ပါဗ်ာ.. မိတ္ေတြမ်ားအားလံုး အတြက္ အဆင္ေျပေအာင္အတတ္ႏိုင္ဆံုးၾကိဳးစားေပးပါမယ္ခင္ဗ်ာ။

Sunday, November 3, 2013

PC တလံုးထဲမွာ windows 2 ခုကိုတၿပိဳင္တည္း သံုးခ်င္ရင္ ဒါေလးကိုသံုးပါ VirtualBox 4.3.2 Free Download


Virtual Box ကို က်ေနာ္ရဲ႕သူငယ္ခ်င္းေတြ သိၾကမလားမသိဘူးေနာ္

သူက ဘာသံုးရတာလဲဆိုေတာ့ ဥပမာ။  ။အခု႔က်ေနာ္သံုးေနတာက windows 7

ေနာက္ထပ္ windows 8 ကို ဒီကြန္ျပဴတာမွာပဲ ထပ္သံုးခ်င္တယ္ ဆိုရင္ Virtual Box

ကို အသံုးျပဳ႕ႏိူင္ပါတယ္။ဒါက်ေတာ့ windows တင္သလိုတင္စရာမလိုေတာ့ဘူးေပါ့

တျခားအလုပ္ေတြလည္း လုပ္ေနလို႔ရတယ္။VM ware Player နဲ႔ အတူတူပါပဲ

အသံုးျပဳ႕ခ်င္တယ္ဆိုေအာက္ေဒါင္းသြားလို႔ရပါတယ္ခင္ဗ်ာ

အျခား OS ေတြအတြက္လဲတင္ေပးလိုက္ပါတယ္ဗ်ာ..


DOWNLOAD


အဆင္ေျပပါေစခင္ဗ်ာ........
Myanmar IT Sky

Download အဆင္မေျပရင္ ေက်းဇူးျပဳၿပီးစာေလးေရးၿပီးေျပာခဲ့ပါဗ်ာ.. မိတ္ေတြမ်ားအားလံုး အတြက္ အဆင္ေျပေအာင္အတတ္ႏိုင္ဆံုးၾကိဳးစားေပးပါမယ္ခင္ဗ်ာ။

Saturday, October 26, 2013

Window Shortcut Arrow Editor ( for PC )


မဂၤလာပါဗ်ာ ပုံမွန္အားၿဖင္႔ SoftWare တစ္ခုကုိ Install ၿပဳလုပ္လုိက္ေသာအခါ
ကြန္ပ်ဴတာ မ်က္ႏွာၿပင္ေပၚမွာ ၿမင္ေတြ႔ေနရတဲ႔ ေဆာ႔ဝဲလ္ရဲ႕ Icon ေတြမွာ
ၿမားေကာက္ေလးနဲ႔ Shortcutပုံေလး ေပၚေနမယ္ ၿဖစ္ပါတယ္။ အဲဒီ ေပၚေနတဲ႔
Shortcut ၿမားေကာက္ေလးကုိ ေဖ်ာက္ထားခ်င္ရင္ေတာ႔ ေအာက္က လင္႔ႏွင္႔
 ေဆာ႔ဝဲလ္ကုိ ေဒါင္းၿပီး Winrar ဖုိင္ထဲမွာ windows 8 အတြက္နဲ႔ Windows 7 အတြက္ဆုိၿပီး ႏွစ္မ်ဳိးရွိပါတယ္။ အဲဒီ အထဲပဲ 64bit နဲ႔ 86bit ဆုိၿပီး ႏွစ္ခုေတြ႔ရပါမယ္။
မိမိ Windows ႏွင္႔ ကုိက္ညီတဲ႔ ေကာင္ကုိ ေရြးခ်ယ္ အသုံးၿပဳပါ...................။

credit >> ေမာက္ေမာက္ေလး


DOWNLOAD


အဆင္ေျပပါေစခင္ဗ်ာ........
Myanmar IT Sky

Download အဆင္မေျပရင္ ေက်းဇူးျပဳၿပီးစာေလးေရးၿပီးေျပာခဲ့ပါဗ်ာ.. မိတ္ေတြမ်ားအားလံုး အတြက္ အဆင္ေျပေအာင္အတတ္ႏိုင္ဆံုးၾကိဳးစားေပးပါမယ္ခင္ဗ်ာ။

Wednesday, October 23, 2013

ဘာ ေဆာ့ဖ္၀ဲမွ မသံုးပဲကြန္ပ်ဴတာအဖြင့္အပိတ္ကိုကိုယ္ၾကိဳက္တဲ့အသံထည့္မယ္ ( for XP )


အရင္တစ္ခါက Window ဖြင့္/ပိတ္ အသံကိုၾကိဳက္တဲ့အသံထည့္တဲ့
နည္းေလးကိုတင္ေပးခဲ့ဖူးပါတယ္.. အဲဒီတုန္းကေတာ့ေဆာ့ဖ္၀ဲကို
အသံုးျပဳၿပီးျပဳလုပ္နည္းေလးပါ .. ဒီတစ္ခါမိတ္ေဆြမ်ားအတြက္
ဘာေဆာ့ဖ္၀ဲမွမသံုးပဲ Window XP ရဲ့ အဖြင့္ / အပိတ္ အသံေတြကို
မိမိ ၾကိဳက္တဲ့အသံ (ဒါမွမဟုတ္) သီခ်င္းသံေလးေတြထည့္တဲ့နည္း
ေလးကိုေဖာ္ျပေပးသြားပါမယ္ဗ်ာ.. ကၽြန္ေတာ္လဲ Window XP မွာပဲ
လုပ္တဲ့နည္းေလးကိုေတြ႕ထားလို႕ပါ.. Window 7 နဲ႕ Window 8
မွာေတာ့ မကလိရေသးလို႕မသိေသးပါဘူးေနာ္.. ဒီနည္းေလးအတိုင္း
မလုပ္ခင္သတိေပးစရာေလးေတာ့ရွိတယ္ေနာ္. အဲဒါကေတာ့ မိမိျပဳလုပ္
မယ့္ အသံ (ဒါမွမဟုတ္) သီခ်င္း ေတြကို Wave ဖိုင္အမ်ိဳးအစားျဖစ္ေအာင္
့အရင္ Format ေျပာင္းထားရပါမယ္. က်န္္တဲ့ ဘာ ဖို္င္အမ်ိဳးအစားမွမရပါ
ဘူး.. Wave ဖိုင္ပဲရတာပါ.. Wave ဖိုင္သာေျပာင္းထားၾကပါဗ်ာ.. Wave
ဖိုင္ေျပာင္းနည္းကိုေတာ့မေျပာျပေတာ့ဘူးေနာ္.. ကဲ..စလိုက္ၾကရေအာင္ဗ်ာ ..

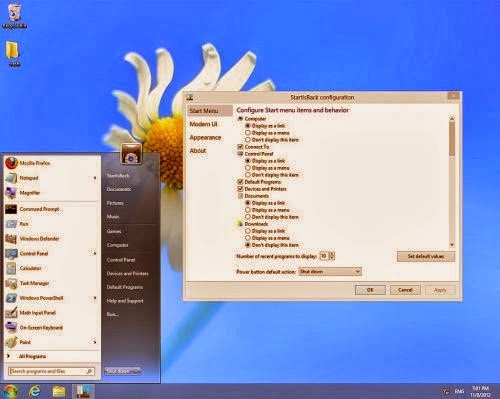
၁။    အရင္ဆံုး မိမိကြန္ပ်ဴတာရဲ့ window start ဘားကို click ၿပီး
Control Panel ကိုအရင္ Click လိုက္ပါ.. ပံု (၁)အတိုင္းပါ။

ပံု (၁)

၂။    အဲဒီအခါက်ရင္ Control Panel Box က်လာပါလိမ့္မယ္... အဲဒီ
Box ထဲမွာ Sound and Audio Device ဆိုတာကိုရွာၿပီး double click လိုက္ပါ။
ပံု (၂) ႏွင့္ (၃) အတိုင္းပါ။

ပံု (၂) ႏွင့္ (၃)

၃။    အဲဒီအခါ Sound and Audio Device Properties ဆိုတဲ့ Box
က်လာပါလိမ့္မယ္. ပံု (၄)အတိုင္းပါ။

ပံု (၄)

၄။    အဲဒီ Sound and Audio Device Properties Box မွ Sound ဆိုတဲ့
Tab ကို Click လိုက္ပါ။ ပံု (၅)အတိုင္းပါ။

ပံု (၅)

၅။    Sound Tab ရဲ့ေအာက္မွာ Program events ဆိုတဲ့ ေလးေထာင့္
ကြက္ၾကီးထဲက Start Windows ဆိုတာကိုရွာၿပီး select ေပးလိုက္ပါ။ အဲဒီလို
Select ေပးၿပီးရင္သူ႕ရဲ့ေအာက္မွ Browse ဆိုတဲ့ေလးေထာင့္ကြက္ေလးကိုေတြ႕
မွာပါေနာ္. အဲဒီ Button ေလးကို Click လိုက္ပါ။ ပံု (၆)အတိုင္းပါ။ 
 
ပံု (၆)

အဲဒီအခါ Open Box တစ္ခု က်လာပါလိမ့္မယ္.. အဲဒီ Box ထဲမွာ မိမိအရင္ဦးဆံုး
ေျပာင္းထားတဲ့ မိမိေျပာင္းလိုတဲ့ အသံဖိုင္ (ဒါမွမဟုတ္) သီခ်င္းဖိုင္ ရွိရာကို
သြားလိုက္ပါ.. ၿပီးရင္ Openကို Click ၿပီး စက္ကို Restart ခ်လိုက္ပါ.. window
စပြင့္ရင္လန္းသြားပါပီ..
အဲ.. Window Shut down သံကိုေတာ့ကိုယ့္ဖာသာကိုေျပာင္းႏုိင္မယ္ထင္ပါ
တယ္. ပံု (၆) ထဲက Start Windows ဆိုတဲ့ေနရာမွာ Window Shut down
ဆိုတာကိုလိုက္ရွာၿပီး အဲဒီနည္းအတုိင္းသာလုပ္လုိက္ပါ.. အဆင္ေျပပါလိမ့္မယ္..
အထက္ကနည္းကေတာ့ Window XP အတြက္ပါေနာ္.. Window 7 / 8 ေတြ
အတြက္ေတာ့ကၽြန္ေတာ္ မကလိရေသးလို႕ပါ.. window 7 မွာေတာ့ ကၽြန္ေတာ္
Window ပိတ္တဲ့အသံကိုေတာ့ေတြ႕ထားပါတယ္..အဲဒါေတာ့ေျပာင္းလို႕ရပါတယ္..
က်န္တာေတာ့ကၽြန္ေတာ္ထပ္ပီး ကလိလိုက္ဦးမယ္ေနာ္.. ပီးရင္တင္ေပးလိုက္ပါမယ္ဗ်ာ..
သိတဲ့သူရွိရင္လဲ Comment မွာစာေလးေရးၿပီးခ်န္ခဲ့ပါဗ်ာ. ကၽြန္ေတာ္ ပို႕စ္
အျဖစ္ျပန္ၿပီး Share ေပးပါမယ္ေနာ္..

ကဲ..အားလံုးကိုေက်းဇူးတင္ပါတယ္ဗ်ာ.


DOWNLOAD

LINK (1)

LINK (2)


အဆင္ေျပပါေစခင္ဗ်ာ........
Myanmar IT Sky

Download အဆင္မေျပရင္ ေက်းဇူးျပဳၿပီးစာေလးေရးၿပီးေျပာခဲ့ပါဗ်ာ.. မိတ္ေတြမ်ားအားလံုး အတြက္ အဆင္ေျပေအာင္အတတ္ႏိုင္ဆံုးၾကိဳးစားေပးပါမယ္ခင္ဗ်ာ။

Tuesday, October 22, 2013

Windows 8 ႏွင့္ 8.1တို႔အတြက္ PC setting ကိုလြယ္လြယ္သြားႏိူင္ဖို႔အတြက္ Desktop Shortcut ( for PC )


ဒီတခါေပးခ်င္တာကေတာ့ အခု႔ရက္ပိုင္းအတြင္းမွာ နာမည္ႀကီးၿပီးအသစ္ထြက္လာတဲ့
windows 8.1 နဲ႔ windows 8 တို႔အတြက္ပါ Tiles ေတြအသံုးျပဳ႕တဲ့ windows ေတြမွာ
ဟို menu ဖြင့္ ဒီ button ေတြ ဖြင့္ လုပ္ရတာတကယ္ေတာ့မလြယ္ဘူး ဟိုဝင္ ဒီထြက္နဲ႔ တိုင္ပါတ္ေနၾကရပါတယ္။ Software တခု႔ခု႔ ကိုျပင္ခ်င္လို႔ဒါမွမဟုတ္ထုတ္ခ်င္လို႔ ရွိရင္
လိုက္ရွာရတာကို က အလုပ္တခု႔ျဖစ္ေနပါမယ္အခု႔က်ေနာ္ေပးမယ့္ PC settin.exe ေလးကို
 မိမိႀကိဳက္ႏွစ္သက္ရာေနရာေလးမွာ install လုပ္ ေပးထားလိုက္ပါ။ဖိုင္ဆိုဒ္ကလည္းေသးေသးေလးပါ
273.52 KB ပဲရွိပါတယ္ ဒါေပမယ့္ သူငယ္ခ်င္းေတြအတြက္ အရမ္းအသံုးဝင္ပါလိမ့္မယ္...

Credit >> ကိုလတ္ (ကၽြဲဆင္း)


DOWNLOAD


အဆင္ေျပပါေစခင္ဗ်ာ........
Myanmar IT Sky

Download အဆင္မေျပရင္ ေက်းဇူးျပဳၿပီးစာေလးေရးၿပီးေျပာခဲ့ပါဗ်ာ.. မိတ္ေတြမ်ားအားလံုး အတြက္ အဆင္ေျပေအာင္အတတ္ႏိုင္ဆံုးၾကိဳးစားေပးပါမယ္ခင္ဗ်ာ။

Sunday, October 20, 2013

Windows 7 Back up and Restore ျပဳလုပ္နည္း


ဒီေန ့ေတာ့ က်ေနာ္ေဖၚျပေပးမယ့္နည္းလမ္းေလးကေတာ့  Back up and restore ျပဳလုပ္ျခင္း အေၾကာင္းေလးျဖစ္ပါတယ္.ဒီေခါင္းစဥ္က ဟိုးေရွးေရွးတုန္းက က်ေနာ္တို ့ျမန္မာလူမ်ိဳး ဆရာ့၊ ဆရာၾကီးေတြ အေတာ္မ်ားမ်ား ေရာ၊ အျခားလူမ်ိဳးေတြေရာဘာသာစကားေပါင္းစံုနဲ ့အြန္လိုင္းေပၚမွာ တင္ျပခဲ့ျပီးသားျဖစ္ပါတယ္. အခုမွဘာလို ့က်ေနာ္တင္ျပရသလဲဆိုရင္ ရွင္းရွင္းေျပာ ရရင္ ေမးထားတဲ့မိတ္ေဆြ မ်ားရွိတဲ့အတြက္ေရာ၊ က်ေနာ့္ ဆိုဒ္ထဲမွာျပီးျပည့္စံုေစခ်င္တာေရာ ၊လာေရာက္ေလ့လာတဲ့ မိတ္ေဆြမ်ားအတြက္နည္းပညာတစ္ခုခု ပါသြားေစခ်င္လို ့ေရးသားလိုက္ ရျခင္းျဖစ္ပါတယ္။ ဒီပိုစ့္က အားလံုးအတြက္ အရွင္းလင္းဆံုး၊ နားလည္နိုင္ဆံုး ျဖစ္ေစရန္အတြက္ အေသးစိတ္တစ္ဆင့္ခ်င္းကို ရွင္းလင္းေဖၚျပေပးထားတာျဖစ္ပါတယ္။ ကဲစလိုက္ၾကရေအာင္ back up ဘာလို ့လုပ္ရသလဲဆိုရင္ မိမိတို ့ရဲ ့ဝင္းဒိုးျပႆနာေတြ ခဏခဏတက္ေနတဲ့အတြက္ အစကေနျပန္ျပန္ျပီး Windows မတင္ခ်င္တာရယ္၊ မိမိအခ်ိန္ ကုန္ခံျပီးထည့္သြင္းထားတဲ့ program ေတြကို Windows  ေၾကာင့္၊ virus ေၾကာင့္၊ အျခားျပႆနာ တစ္ခုခုေၾကာင့္ မပ်က္ဆီး မဆံုးရံႈးခင္မွာ back up လုပ္ထားလိုက္ရင္ Windows ျပန္တင္စရာမလိုဘဲ အဲဒီ back up Image ဖိုင္ကို ျပန္ထည့္လိုက္တာနဲ႔ Windows လည္း တင္ၿပီးသား၊ Software ေတြလည္း တင္ၿပီးသား ျဖစ္သြားေအာင္ ျပဳလုပ္ျခင္းျဖစ္ပါတယ္။ အလြယ္ဆံုးနည္းေျပာရရင္ Windows Partition အပိုင္းတစ္ခုလံုးကို Image file အျဖစ္ copy ကူးယူလိုက္ျခင္းျဖစ္ပါတယ္.

မွတ္ခ်က္။   ။ back up လုပ္တယ္ဆိုတာ ဝင္းဒိုးတင္ျပီး အေရးၾကီးလိုအပ္တဲ့ Program ေတြ၊ Driver ေတြ ထည့္ျပီးတဲ့ အခ်ိန္ မွာ လုပ္ထား သင့္ပါတယ္။ အခ်ိန္ကာလၾကာလာတာနဲ ့အမွ် ဝင္းဒိုးထဲမွာလဲ program ေတြမ်ားလာမွာျဖစ္တဲ့အတြက္ ဒီအခ်ိန္ၾကမွ back up လုပ္မယ္ဆိုရင္ အခ်ိန္ အရမ္းၾကာမွာျဖစ္ျပီ Restore ျပန္လုပ္မယ္ဆိုရင္ လဲအခ်ိန္ေတြၾကာေန အံုးမွာျဖစ္ပါတယ္။ ဒါေၾကာင့္ မိတ္ေဆြမ်ားအေနနဲ ့အေပၚမွာ က်ေနာ္ေျပာခဲ့သလို ဝင္းဒိုးတင္ျပီး လိုအပ္တာေတြ ျဖည့္စြပ္ျပီးတဲ့ အခ်ိန္မွာ back up လုပ္ေပးၾကပါ ဒါမွ Windows ျပန္တင္ရတဲ့ ဒုကၡ ၊ program ေတြ ၊ Driver ေတြ ထည့္သြင္း ရတဲ့ ဒုကၡ မွကင္းေဝးမွာျဖစ္ပါတယ္။ အားသာခ်က္အေနနဲ ့ေျပာရမယ္ဆိုရင္ ဝင္းဒိုးတစ္ခုလံုးကို back up မလုပ္ဘဲ မိမိအတြက္ အသံုးဝင္တဲ့  program ကိုဘဲ back up လုပ္နိုင္တာပါ။ မိမိတို ့ back up လုပ္တဲ့အခ်ိန္မ်ားမွာ Data ေတြကိုေရြးခ်ယ္ျပီး back up လုပ္ခြင့္ရွိတာကို ေရြးခ်ယ္ေပးခဲ့မယ္ဆိုရင္ မိမိ back up လုပ္ခ်င္တာကိုဘဲ လုပ္နိုင္မွာျဖစ္ပါတယ္။ restore ျပန္လုပ္မယ္ဆိုရင္လဲ မိမိအသံုးျပဳမယ့္ back up file ကိုဘဲ restore ျပဳလုပ္နိုင္ပါတယ္။

*********************************************
Back Up ျပဳလုပ္နည္း

အရင္ဆံုး Back up လုပ္တဲ့အပိုင္းကိုအရင္သြားပါမယ္... မိတ္ေဆြမ်ားအရွင္းလင္းဆံုးျဖစ္ေအာင္ က်ေနာ္ ပံုေလးေတြနဲ ့ေဖၚျပေပးပါမယ္။


( ပံု - ၁ )
( ပံု - ၁ ) အတိုင္း  Control Panel ထဲက Backup and Restore ကိုသြားပါ။


( ပံု - ၂ )
( ပံု - ၂ ) အတိုင္း Set up backup ကို Click ပါ။

 
( ပံု - ၃ )
( ပံု - ၃ ) အတိုင္း မိမိသိမ္းမယ့္ Partition  အပိုင္းတစ္ခုခုကိုေရြးခ်ယ္ေပးရမွာပါ.က်ေနာ္ကေတာ့ Partition D: ထဲမွာ သိမ္းျပီးေဖၚျပမွာျဖစ္ပါတယ္။ တကယ္လို ့မိမိက စက္ထဲ မွာမသိမ္းခ်င္လို ့အျခား ၾကိဳက္ႏွစ္သက္ရာ memory storage မွာသိမ္းနိုင္ပါတယ္။ အဲဒီအတြက္ အသံုးျပဳမည့္ memory storage ကိုမိမိစက္မွာတပ္ျပီး Refresh ကို click ေပးလိုက္ရင္ မိမိရဲ ့memory storage ကိုေဖၚျပေပး လာပါလိမ့္မယ္။ ျပီးရင္  Next ကို Click  ပါ။


( ပံု - ၄ )

( ပံု - ၄ ) အတိုင္း back up ျပဳလုပ္ရာမွာ မိမိၾကိဳက္ႏွစ္သက္ ရာကိုဘဲေရြးခ်ယ္နိုင္ဖို ့အတြက္ Let me choose ကိုေရြးေပးျပီး Next ကို Click  ပါ။


( ပံု - ၅ )
( ပံု - ၅ ) အတိုင္း မိမိ back up လုပ္မည့္ ဖိုင္ေတြကိုအတည္ျပဳျပီး  Next ကို Click  ပါ။


( ပံု - ၆ )
( ပံု - ၆ )  ကိုေရာက္လာရင္ Change schedule ကို click ျပီး ( ပံု - ၇ ) အတိုင္း မိမိတို ့ back up လုပ္ခ်င္တဲ့ အခ်ိန္ေတြ သက္မွတ္ေပးနိုင္ပါတယ္။


( ပံု - ၇ )


( ပံု - ၈ )
( ပံု - ၈ ) အတိုင္း  Save settings and run backup ကို Click ေပးလိုက္ပါ။


( ပံု - ၉ )
( ပံု - ၉) အတိုင္း back up လုပ္ေနတာကို ျပီးတဲ့အခ်ိန္ထိ ေစာင့္ေနေပးလိုက္ပါ။ျပီးသြားရင္ေတာ့ back up လုပ္တဲ့အပိုင္းျပီးပါျပီ။ မိမိသိမ္းထားတဲ့  memory storage မွာသြားၾကည့္လိုရင္ WindowsImageBackup ဆိုတဲ့ Folder ေလးေတြ ့ရပါလိမ့္မယ္.

အခုဆက္ျပီး Restore လုပ္တဲ့အပိုင္းကိုဆက္သြားၾကရေအာင္...


မိမိတို ့backup ျပဳလုပ္ထားတဲ့ image file ကို ဘယ္လို restore ျပဳလုပ္မလဲဆိုရင္ ေအာက္ကပံု ေလးေတြ အတိုင္း တစ္ဆင့္ခ်င္းသြားရမွာျဖစ္ပါတယ္. Control Panel > Back up and  Restore ကို Click ပါ။


( ပံု - ၁၀ )
( ပံု - ၁၀ ) အတိုင္း Recover system setting or your computer ကို Click ပါ။


( ပံု - ၁၁ )
( ပံု - ၁၁ ) အတိုင္း ျပီးေတာ့ Advance recovery method ကို Click ပါ။


( ပံု - ၁၂ )
( ပံု - ၁၂ ) အတိုင္း ေရာက္လာရင္ ( Choose Advance recovery method ) တြင္ မိမိသိမ္းထားခဲ့ တဲ့ Back up file မွတစ္ဆင့္ Restore လုပ္မွာျဖစ္တဲ့အတြက္ Use a system image you created earlier to recover your computer ကိုေရြးျပီး Click ေပးလိုက္ပါ။


( ပံု - ၁၂ )
( ပံု - ၁၂ ) အတိုင္း Restart ကို click ေပးလိုက္ပါ။


( ပံု - ၁၃ )
( ပံု - ၁၃ ) အတိုင္း  Next က္ို Click ပါ။


( ပံု - ၁၄ )
( ပံု - ၁၄ ) အတိုင္း back up လုပ္ထားတဲ့ image file တည္ေနရာကို  အလိုအေလ်ာက္ ေဖၚျပေပးပါလိမ့္မယ္။ Next က္ို ဆက္ျပီး Click ပါ။


( ပံု - ၁၅ )
( ပံု - ၁၅ ) အတိုင္း  Next က္ို Click ပါ။

 
( ပံု - ၁၆ )
( ပံု - ၁၆ ) အတိုင္း  Finish က္ို Click ပါ။


( ပံု - ၁၇ )
( ပံု - ၁၇ ) အတိုင္း မိမိကြန္ပ်ဴတာရဲ ့back up လုပ္ထားတဲ့ image file ကို restore ျပဳလုပ္ေနပါလိမ့္မယ္ သူ ့ကိုလဲေစာင့္ေနေပးလိုက္ပါ.အားလံုးျပီးသြားရင္ windows ျပန္တက္လာတဲ့အခ်ိန္မွာ မိမိ windows ဟာ backup မလုပ္ခင္အခ်ိန္က အတိုင္းျပန္လည္ရရွိမွာျဖစ္ပါတယ္။

Credit >> ကိုေနမင္းခတ္ (နည္းပညာ)


DOWNLOAD

LINK (1)

LINK (2)


အဆင္ေျပပါေစခင္ဗ်ာ........
Myanmar IT Sky

Download အဆင္မေျပရင္ ေက်းဇူးျပဳၿပီးစာေလးေရးၿပီးေျပာခဲ့ပါဗ်ာ.. မိတ္ေတြမ်ားအားလံုး အတြက္ အဆင္ေျပေအာင္အတတ္ႏိုင္ဆံုးၾကိဳးစားေပးပါမယ္ခင္ဗ်ာ။

Friday, October 18, 2013

Windows 8 Activator RemoveWat With Crack ( for PC )


Window 8 အသံုးျပဳတဲ့မိတ္ေဆြမ်ားအတြက္ Windows 8 Activator RemoveWat
တင္ေပးလိုက္ပါတယ္ဗ်ာ.. ဖိုင္ဆိုက္ကလဲနည္းနည္းေလးဆိုေတာ့ စက္အတြက္
သက္သာပါတယ္. PC မိတ္ေဆြမ်ားအတြက္ေဆာင္ထားသင့္တဲ့ေကာင္ေလးပါ..
ေအာက္မွာဖတ္ၾကည့္ပီးအသံုးျပဳမယ္ဆိုရင္ေဒါင္းသြားႏိုင္ပါတယ္..

        *  Support Windows 8 Enterprise (x86_x64) Bit OS

        * Support Windows 8 Professioanl (x86_x64) Bit OS

        * Windows 8 Release Preview Watermark Remover.

        * Windows 8 Consumer Preview Watermark Remover

        * Windows 8 KMS Activator

        * Windows 8 Professional Keys

        * Windows 8 Ultimate Keys

        * Unlock Personalization

        * Change Profile Pictures, WallPaper, StartScreen

        * Windows 8 Activation Reset

        * Rearm Windows

        * And Many More Features.


DOWNLOAD


အဆင္ေျပပါေစခင္ဗ်ာ........
Myanmar IT Sky

Download အဆင္မေျပရင္ ေက်းဇူးျပဳၿပီးစာေလးေရးၿပီးေျပာခဲ့ပါဗ်ာ.. မိတ္ေတြမ်ားအားလံုး အတြက္ အဆင္ေျပေအာင္အတတ္ႏိုင္ဆံုးၾကိဳးစားေပးပါမယ္ခင္ဗ်ာ။

Window 8 StartButton ( for PC )


Window8 အသံုးျပဳတဲ့မိတ္ေဆြမ်ားအတြက္ StartButton အသစ္ေလး
ေတြ႕လို႕တင္ေပးလိုက္ပါတယ္ဗ်ာ.. စမ္းၿပီးသံုးၾကည့္မယ္ဆိုေအာက္မွာ
ေဒါင္းယူႏိုင္ပါတယ္ဗ်ာ..


DOWNLOAD


အဆင္ေျပပါေစခင္ဗ်ာ........
Myanmar IT Sky

Download အဆင္မေျပရင္ ေက်းဇူးျပဳၿပီးစာေလးေရးၿပီးေျပာခဲ့ပါဗ်ာ.. မိတ္ေတြမ်ားအားလံုး အတြက္ အဆင္ေျပေအာင္အတတ္ႏိုင္ဆံုးၾကိဳးစားေပးပါမယ္ခင္ဗ်ာ။

Sunday, October 13, 2013

Window ကိုအသစ္အရင္အတိုင္းျပန္ျဖစ္ေအာင္လုပ္ေဆာင္ေပးမယ့္ Windows.Repair ( for PC )


အေၾကာင္းအမ်ိဳးမ်ိဳးေၾကာင့္ Window က်သြားလို႕ စိတ္ညစ္ေနတဲ့မိတ္ေဆြမ်ားအတြက္
Windows.Repair Update ေလးပါ Windows Repair ဆိုတဲ့အတိုင္း Error ေတာ္ေတာ္မ်ားမ်ား ရွင္းလင္းေပးတဲ့ေဆာစ့္၀ဲလ္ေလးပါ တကယ္အသံုး၀င္မယ့္ေဆာ့ဖ္၀ဲေလးေနာ္..
Window ကိုအသစ္နီးပါးအတုိင္းျပန္ျဖစ္ေအာင္လုပ္ေဆာင္ေပးႏိုင္တယ္လို႕
ဆိုထားပါတယ္..ကဲ.လိုခ်င္ရင္ေတာ့ေအာက္မွာေဒါင္းယူလိုက္ပါဗ်ာ..


DOWNLOAD


အဆင္ေျပပါေစခင္ဗ်ာ........
Myanmar IT Sky

Download အဆင္မေျပရင္ ေက်းဇူးျပဳၿပီးစာေလးေရးၿပီးေျပာခဲ့ပါဗ်ာ.. မိတ္ေတြမ်ားအားလံုး အတြက္ အဆင္ေျပေအာင္အတတ္ႏိုင္ဆံုးၾကိဳးစားေပးပါမယ္ခင္ဗ်ာ။

Monday, October 7, 2013

Windows 8.1 ရဲ႕ Power Menu မွာ Hibernate ထည္႔ရေအာင္

Window တစ္ခုမွာ Hibenate ဆိုတာရွိသင့္တယ္လို႕ထင္ပါတယ္ေနာ္..
Window 8 ရဲ့ Hibenate ေလးထည့္ပံုထည့္နည္းေလးကိုျပန္လည္ မွ်ေ၀
လိုက္ပါတယ္ဗ်ာ..  Window 8 အသံုးျပဳတဲ့မိတ္ေဆြမ်ားအားလံုးအတြက္
အဆင္ေျပမွာပါ..ေအာက္မွာေဖာ္ျပေပးထားပါတယ္ေနာ္..

Windows 8.1 ရဲ႕ Power Menu မွာ Hibernate ပါမလာဘူးဗ်ာ။
 Hibernate ကလည္း အသံုးတည္႔တယ္မဟုတ္လား။Microsoft .NET Framework 3.5 လိုေပါ႔ ။ Microsoft ကလည္း
 အသံုးျပဳသူ အဆင္ေျပ ေအာင္တစ္ခါထဲ ထည္႔မေပးဘူးဗ်ာ။
 ဘာသေဘာလဲ မသိဘူး ။ ႀကံဳရင္ေမးႀကည္႔က်ပါဦး..
 ဒီေတာ႔က်ေနာ္က Windows 8.1 ရဲ႕ Power Menu မွာ Hibernate ကိုဒီလိုထည္႔လိုက္တယ္..


၁။ Control Panel >> Hardware and Sound >> Power Options 

ကိုသြားပါ။
    

Choose what the power buttons do ကိုႏွိပ္လိုက္ပါ။


 ၂။ Change settings that are curently unavailable ကိုႏွိပ္ပါ။
၃။ ပံုမွာျပထားတဲ႔အတိုင္း ေဘးနားကျမွားေလးကုိ 

Click ေထာက္ျပီးေအာက္ကိုဆြဲခ်လိုက္ပါ။
    

Hibernate ေနရာမွာ အမွန္ေလးျခစ္ခဲ႔ျပီးေတာ႔ Save changes 


ကိုႏွိပ္လိုက္ရင္ရပါျပီ။


အဆင္ေျပမွာပါ။
 
ကိုလြမ္းဦးေမာင္ကို Credit ေပးပါတယ္ဗ်ာ..


အဆင္ေျပပါေစခင္ဗ်ာ........
Myanmar IT Sky

Download အဆင္မေျပရင္ ေက်းဇူးျပဳၿပီးစာေလးေရးၿပီးေျပာခဲ့ပါဗ်ာ.. မိတ္ေတြမ်ားအားလံုး အတြက္ အဆင္ေျပေအာင္အတတ္ႏိုင္ဆံုးၾကိဳးစားေပးပါမယ္ခင္ဗ်ာ။

Windows 8/8.1 ရဲ ့ Startup Applications ေတြကို Manage ျပဳလုပ္ျခင္း။


clip_image002

Applications ေတြ ေတာ္ေတာ္မ်ားမ်ားမွာ ကြန္ျပဴတာ Boot တက္တာနဲ ့ Run ဖို ့ျပဳလုပ္ထားတတ္ၾကပါတယ္။အဲဒီအတြက္ Boot Time ကိုၾကာျမင့္ေစသလို Background မွာ Run ေနတဲ့ အတြက္ System Resources ေတြကိုအသံုးျပဳေနတဲ့အတြက္စက္ကိုေလးလံေစပါတယ္။ Windows Vista နဲ ့ 7 မွာ Startup Applications ေတြကို Manage လုပ္ဖို ့ Tools ေတြပါရွိၿပီးသားျဖစ္ပါတယ္။
Windows 8 မွာလည္း Startup Applications ေတြကို Manage လုပ္ဖို ့ Tool ပါရွိပါတယ္။အရင္ ၀င္းဒိုးေတြ နဲ ့မတူဘဲ Task Manager ကေနအသံုးျပဳရမွာပါ။Task Manager ကေန အသံုးျပဳလို ့ရလာတဲ့အတြက္ ပို မိုအဆင္ေျပေစပါတယ္။
Note : Desktop Applications ေတြကို ပဲ Manage လုပ္ရမွာျဖစ္ပါတယ္။ Modern  or Metro Applications ေတြက Startup မွာ Run ျခင္းမရွိပါဘူး။
Task Manager ကိုဖြင့္နည္းမ်ား။
Windows 8 မွာ Task Manager ကို ဖြင့္ဖို ့အတြက္နည္းေတြ အမ်ားႀကီးရွိပါတယ္။Taskbar ေပၚမွာ Right Click ႏွိပ္ၿပီး Task Manager ကို ႏွိပ္ပါ။
clip_image004

Windows 8 မွာအသစ္ပါရွိလာတဲ့ Win X menu ကေနလည္း Task Manager ကိုသံုးႏုိင္ပါတယ္။ Win X menu ကုိဖြင့္ဖို ့ Windows Key + X  ကိုႏွိ္ပ္ပါ။
clip_image006

Windows + C ကို ႏွိပ္ၿပီး Charms Bar က Search ကိုႏွိပ္ပါ။Search box ကေန task လို ့ရိုက္ပါ။ Apps ကိုႏွိပ္ပါ။
clip_image008

အဲဒီမွာ Task Manager ကိုေတြ ့ျမင္ၿပီးသံုးႏိုင္ပါတယ္။
clip_image010


Startup Applications ေတြကို Manage ျပဳလုပ္ျခင္း။
Task Manager ကိုဖြင့္ရင္ Compact Mode ကိုပဲေတြ ့ျမင္ရမွာျဖစ္ၿပီး Run ေနတဲ့ Programs ေတြကို ပဲေတြ ့ျမင္ရမွာပါ။Startup tab နဲ ့ တစ္ျခား Features ေတြကို အသံုးျပဳႏုိင္ဖို ့ More details ကိုႏွိပ္ပါ။
clip_image012

Startup tab ကိုႏွိပ္ပါ။ အဲဒီမွာ Windows စဖြင့္ဖြင့္ခ်င္းမွာ Run တဲ့ Programs ေတြကိုေတြ ့ျမင္ရမွာပါ။ Disable လုပ္ခ်င္တဲ့ Program ေပၚမွာ Right Click ႏွိပ္ပၿပီး Disable ကိုႏွိပ္ပါ။
clip_image014

Program ကို Select လုပ္ၿပီး Disable button ကိုႏွိပ္လို ့လည္းရပါတယ္။
clip_image016

ၿပီးရင္ေတာ့ Reboot လုပ္ေပးရပါမယ္။
Note : အနည္းငယ္ေသာတစ္ခ်ိဳ ့ Programs ေတြ က Startup မွာ Run မွအဆင္ေျပေျပအလုပ္လုပ္ပါတယ္။ Startup မွာ Disable လုပ္လိုက္လို ့ ေကာင္းေကာင္း အလုပ္မလုပ္ေတာ့ဘူးဆိုရင္ေတာ့ အဲဒီ Program ကို Startup မွာ Enable ျပန္လုပ္ေပးႏုိင္ပါတယ္။
credit >> Thet Naing Oo  


DOWNLOAD

LINK (1)

LINK (2)


အဆင္ေျပပါေစခင္ဗ်ာ........
Myanmar IT Sky

Download အဆင္မေျပရင္ ေက်းဇူးျပဳၿပီးစာေလးေရးၿပီးေျပာခဲ့ပါဗ်ာ.. မိတ္ေတြမ်ားအားလံုး အတြက္ အဆင္ေျပေအာင္အတတ္ႏိုင္ဆံုးၾကိဳးစားေပးပါမယ္ခင္ဗ်ာ။